How to configure Outlook for Zimbra account
These Instruction are successfully tested in Outlook 2013. These settings will not work in network computers which uses proxy servers to connect to the internet.
Add New Account
If this is the first time Outlook has been used, you will be asked if you would like to set up an account. Select Yes and click Next. Otherwise, go to Account Settings.- Outlook 2007: Open the Tools menu and click Account Settings...
- Outlook 2013: Go to the File tab, select Info if it is not already selected, and click Add Account.
Auto Account Setup
Choose Manual setup or additional server types and click Next.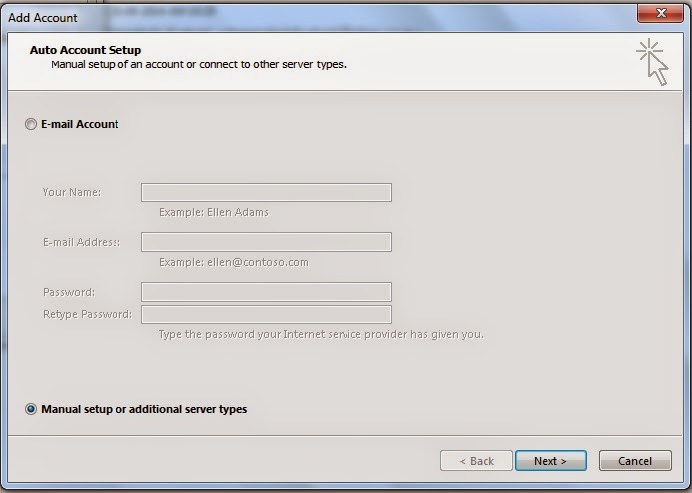
Choose Service
Choose POP or IMAP and click Next.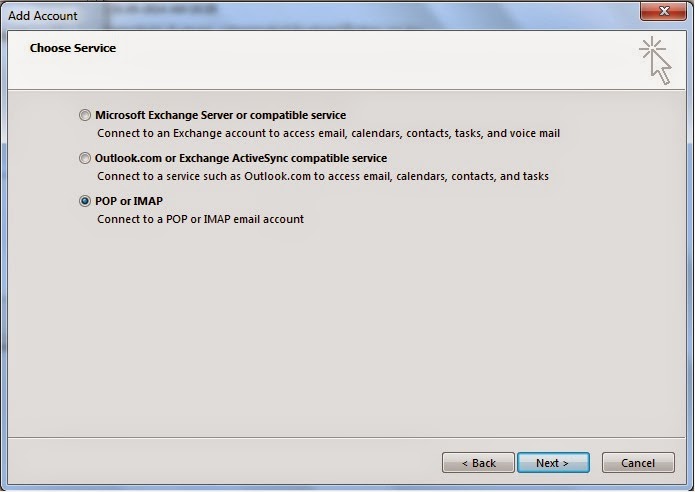
Internet Email Settings
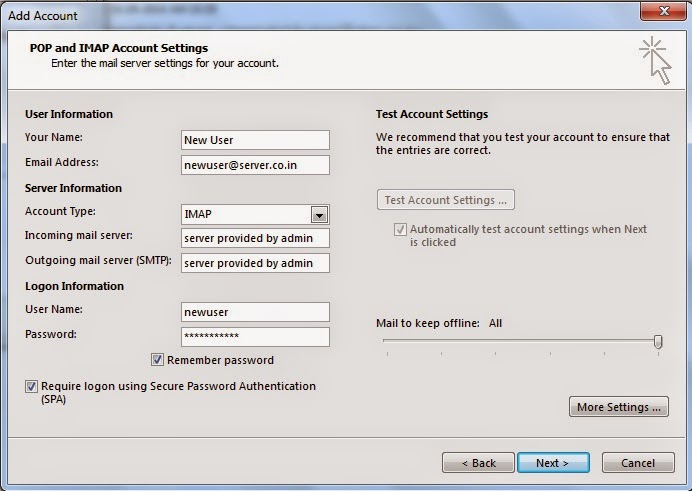
Your Name: Your real name used in your Email Account.
E-mail Address: Your email address for this account.
Incoming mail server: This is the internet location name of your incoming mail server.
Outgoing mail server (SMTP): This is the internet location name of your outgoing mail server.
User Name: This is the login name for your email account.
Password: Enter your password if you want Outlook to remember it for you. Remember Password must be checked for you to enter your password.
Remember Password: You may choose to save your password to avoid entering it every time you check your email.
Require logon using Secure Password Authentication (SPA): Make sure this is turned on.
More Settings...
To set up a secure connection click this button to continue.
Outgoing Server

My outgoing server (SMTP) requires authentication: Be sure to turn this on.
Use same settings as my incoming mail server: This tab should be selected.
Advanced

Incoming server (IMAP): This value should be 993.
Use the following type of encrypted connection: Use "SSL" encryption.
Outgoing server (SMTP): Port 25 is default value selected by Outlook.
Use the following type of encrypted connection: Use "TLS" encryption.
Server Timeouts: The maximum value (10 minutes) works best for both on-campus and off-campus access.
Root folder path: This is the mail folder location on your email account. Set to blank.
Leave all other settings as default and press OK.
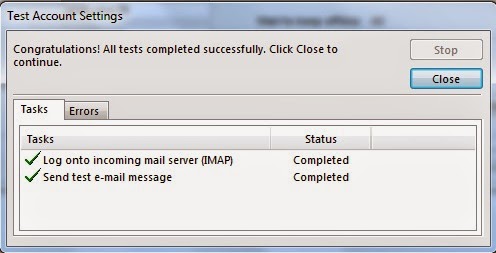
Test Account Settings
Click Test Account Settings... once you have made all necessary configurations. If you did not tell Outlook to remember your password, you will be prompted to enter it now.
If everything is correct, you should see a screen like the one below. Close the Test Account Settings window, then click Next to finish the setup process. If the test fails, recheck the configuration settings and try again.
The test has been done on Outlook 2013. Basic settings are same in case of lower version of Outlook too. You can try with your own Outlook versions.


Comments
Post a Comment